Friday, April 30, 2010
Maple-pecan snack cake
I'm not one to buy pure maple syrup because it's so expensive, but for this recipe I made the exception. Or maybe hubby did since he was the one to buy the syrup on his way home from work. Thanks honey for saving me a trip to the store!
This recipe comes from Cooking Light, which means its lighter on the calories. It's also a quick and easy cake to make. Which happens to be my favorite kind of cake to make.
Whisk the maple syrup, sour cream, butter, vanilla and egg until smooth.
In a separate bowl whisk together flour, baking soda, toasted pecans, and salt.
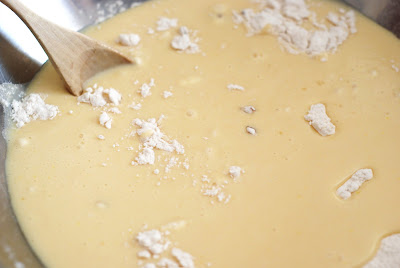
Add the flour mixture to the liquid mixture.
Mix it all together.
and pour it into a pan. Or as I had to do, scrape into a pan. I always laugh when a recipe says to pour a thick mixture when you really have a thick mixture that needs to be coaxed into a pan. It does sound better to say pour mixture rather than say scrape the mixture.
After the cake has baked and is cooling, whip up the frosting.
Slap the frosting on that sweet cake, sit back with a tall glass of cold milk and enjoy this yummy tasting maple cake. But don't forget to make a huge mess in the kitchen(like I always seem to do) and dust yourself with flour so your family will think it was a long and hard job to make this cake.
Maple-Pecan Snack Cake
Adapted from Cooking Light March 2008
Cake
1 cup maple syrup
1 cup reduced -fat sour cream
1/4 cup butter, melted
1 teaspoon vanilla extract
1 large egg
2 1/4 cups all-purpose flour (about 11 1/4 ounces)
1 teaspoon baking soda
1/4 cup chopped pecans, toasted
1/2 teaspoon salt
cooking spray
Frosting
For the frosting I just added my pecans into the frosting before I mixed it. But I had to thin it out a bit with some milk.
1 1/2 cups powdered sugar
2 1/2 tablespoons maple syrup
1 tablespoon whipping cream
1/8 teaspoon salt
1/4 cup chopped pecans, toasted
Preheat oven to 350 degrees
To prepare cake, combine first 5 ingredients, stirring well with a whisk.
Lightly spoon flour into dry measuring cups; level with a knife. Combine flour, baking soda, pecans, and salt in a large bowl, stirring with a whisk. Add syrup mixture to flour mixture; stir until well blended. Pour batter into a 9-inch square baking pan coated with cooking spray. Bake for 30 minutes or until a wooden pick inserted in center come out clean. Cool completely on wire rack.
To prepare frosting, combine sugar, maple syrup, whipping cream and salt. Beat with a mixer at medium speed until smooth. Spread frosting evenly over cooled cake; sprinkle with 1/4 cup pecans.
Yield: 16 servings (serving size: 1 slice)
Calories 261
Fat 8.4g
Monday, April 26, 2010
Raspberry cordial
In the movie "Anne of Green Gables" (love it and the book) Anne invites her best friend Diana over to tea. By a mistake, Anne serves Diana currant wine instead of the cordial. A simple mistake as they are both the same color. Diana finds the wine delicious and drinks three full glasses and staggers home drunk to the dismay of Anne.
After hearing about raspberry cordial, I wondered, what does it taste like? The only way to find out was to find a recipe and make it.
With this quick recipe you can use fresh or frozen raspberries. I didn't have enough frozen berries so I went to Costco and found some fresh ones.
Put the sugar and the berries into a saucepan and cook it until
the sugar dissolves.
Pour into a strainer
and mash the mixture to get the juice.
add lemon juice and stir.
Once the boiling water has been added, cool and then refrigerate.
After taking a sip of this drink, all I can say is I need to plant some raspberry bushes and thank you L.M Montgomery for introducing me to raspberry cordial and Anne Shirley
Raspberry Cordial
Adapted from recipezaar.com
19 oz of fresh or frozen raspberries
1 1/4 sugar
4 cups of boiling water
juice of two lemons-I used large lemons.
Add the sugar and raspberries into a saucepan and cook until the sugar is dissolved. About 20-25 minutes. Pour the mixture into a strainer and mash. To completely remove the seeds, you may want to strain it again by pouring it through a fine mesh strainer. Discard pulp.
Add the strained juice of two lemons and stir.
Add 4 cups of boiling water, stir and let cool before refrigerating.
Friday, April 23, 2010
Antiques
Last week I went to an antique fair with my mom and brought home some goodies.
I've started to add some silver pieces to the house because I have suddenly decided I like it. I thought I would put the pieces in my bedroom, but I like them in the family room.
I bought this table for $25.00! Sweet deal!
Rocks from my backyard my youngest and I collected. A strange combo, but I like it.
Dizzy wondering why the heck I'm taking pictures of the furniture.
I don't know Dizzy. It's one of the many crazy things I do during the day.
I bought this chalkboard made out of an old door and I wasn't sure what I was going to do with it.
Then I got the great idea of having my 17 year old write out our name and the year I married. I love the way she writes. You do not want to see what my handwriting looks like. Oh no, It would give you nightmares.
I wasn't sure where I would hang it. I thought I might hang it in the stairwell and put family photos around it, but I think it looks great over my bed. Now I just need to get hubby to hang it up.
Thursday, April 22, 2010
A brownie so good you'll want to marry it!
I love this simple and easy brownie recipe so much I want to marry it. Well, not,really. It just makes me so happy. I don't get a chocolate craving too often but last night my stomach was calling for some chocolate. I needed something that would warm my soul. I needed warm soft chewy yummy brownies.
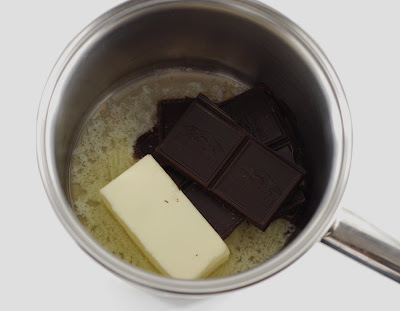
Melt the chocolate and butter. Already a good combo!
Pour it into a metal bowl and let it sit for two minutes. This will cool the mixture enough so when you add the chocolate chips later they won't melt when it bakes in the oven.
Add the sugar, eggs and vanilla to the cooled chocolate and mix until just incorporated.
Add the flour and chocolate chips.
Mix it up and pour it into a pan.
And please don't step on the kitty on your way to the oven like I did. :( Sorry Dizzy!
She likes to hang out in the kitchen when I cook and sometimes I forget she's there keeping me company.
See how the chocolate chips don't melt?
How to enjoy a brownie.
Dried strawberries and mini chocolate chips.
Peanut butter chips with mini chocolate chips.
Chocolate sprinkles.
How to enjoy a brownie like a 9 year old.
A plain brownie for him? No way. First you got to jazz it up!
Yeah, that's the ticket!
Take a bite.
Oh it's so good. I can't say a word.
No really. No more questions. I must enjoy my brownie in peace.
Chocolate Brownies
1/2 cup butter
2 ounces of bittersweet chocolate (I use Ghirardelli)
1 cup of sugar
2 eggs
1 teaspoon of vanilla
3/4 cup all-purpose flour
1/2 cup semisweet chocolate chips
Pre-heat oven to 350 degrees.
Lightly spray an 8x8x2-inch baking pan.
In a medium saucepan melt the butter and the bittersweet chocolate over low heat.
Pour the melted butter and chocolate into a bowl. Let it cool for two minutes.
Stir in sugar, eggs, and vanilla. Mix until just combined.
Mix in flour and 1/2 cup of semi sweet chocolate chips.
Spread the batter into sprayed baking pan.
Bake for 30 minutes and cool on a wire rack.
Monday, April 19, 2010
Brioche
I love to make bread and the smell of homemade bread right out the oven makes my toes wiggle with delight. But I'll admit it, as much as love making bread, I tend to make the same type over and over. White, whole wheat, dinner rolls and occasional French bread is what I seem to make a lot of. So I was happy to tackle a new bread, brioche.
All I can say is why oh why does it take me so long to make new things? This bread is light and buttery with a tiny hint of sweetness. It does take some time to make, but like all good things, it is worth the wait.
I had to go out and buy these cute little brioche pans. Any excuse to go shopping right?
Before I made the dough, I got my bowl sprayed and ready.
I threw together eggs, flour, sugar, yeast and eggs and mixed them up in the Kitchen Aid.
Then came my favorite part of the recipe.
Nothing says fun than beating butter with a rolling pin. I think I need to get out of the kitchen more because I had way too much doing this. Which probably means I haven't had enough fun lately. Hint hint hubby-we need to have a date night ASAP!
After I took out all my frustration on the poor innocent sweet butter, I broke it up and slowly added it to the dough. It was kind of a rough day for the butter.
After it had been kneaded, the dough got all nice and stretchy-you know it's at this stage when you can pull it and it doesn't break but gets thin.
It proofed for an hour on the counter top and then I refrigerated it overnight as it was getting late.
To make individual rolls, I divided it into two balls,
poked a hole in one
and turned the other into a doughnut shape
and put it into the brioche pan.
Here's what they look like baked.
Hmmm...
I may have to work on my roll making technique. I think I made the balls too big. All right, all right, get your mind out of the gutter. When I say balls I mean the dough balls the ones that -oh forget it.
Seriously, I think my messed up rolls are mocking me.
Oh yeah? You know what happens when a roll mocks me?
Yeah that's right-I will gobble you up! Take that you little punk.
Subscribe to:
Posts (Atom)